

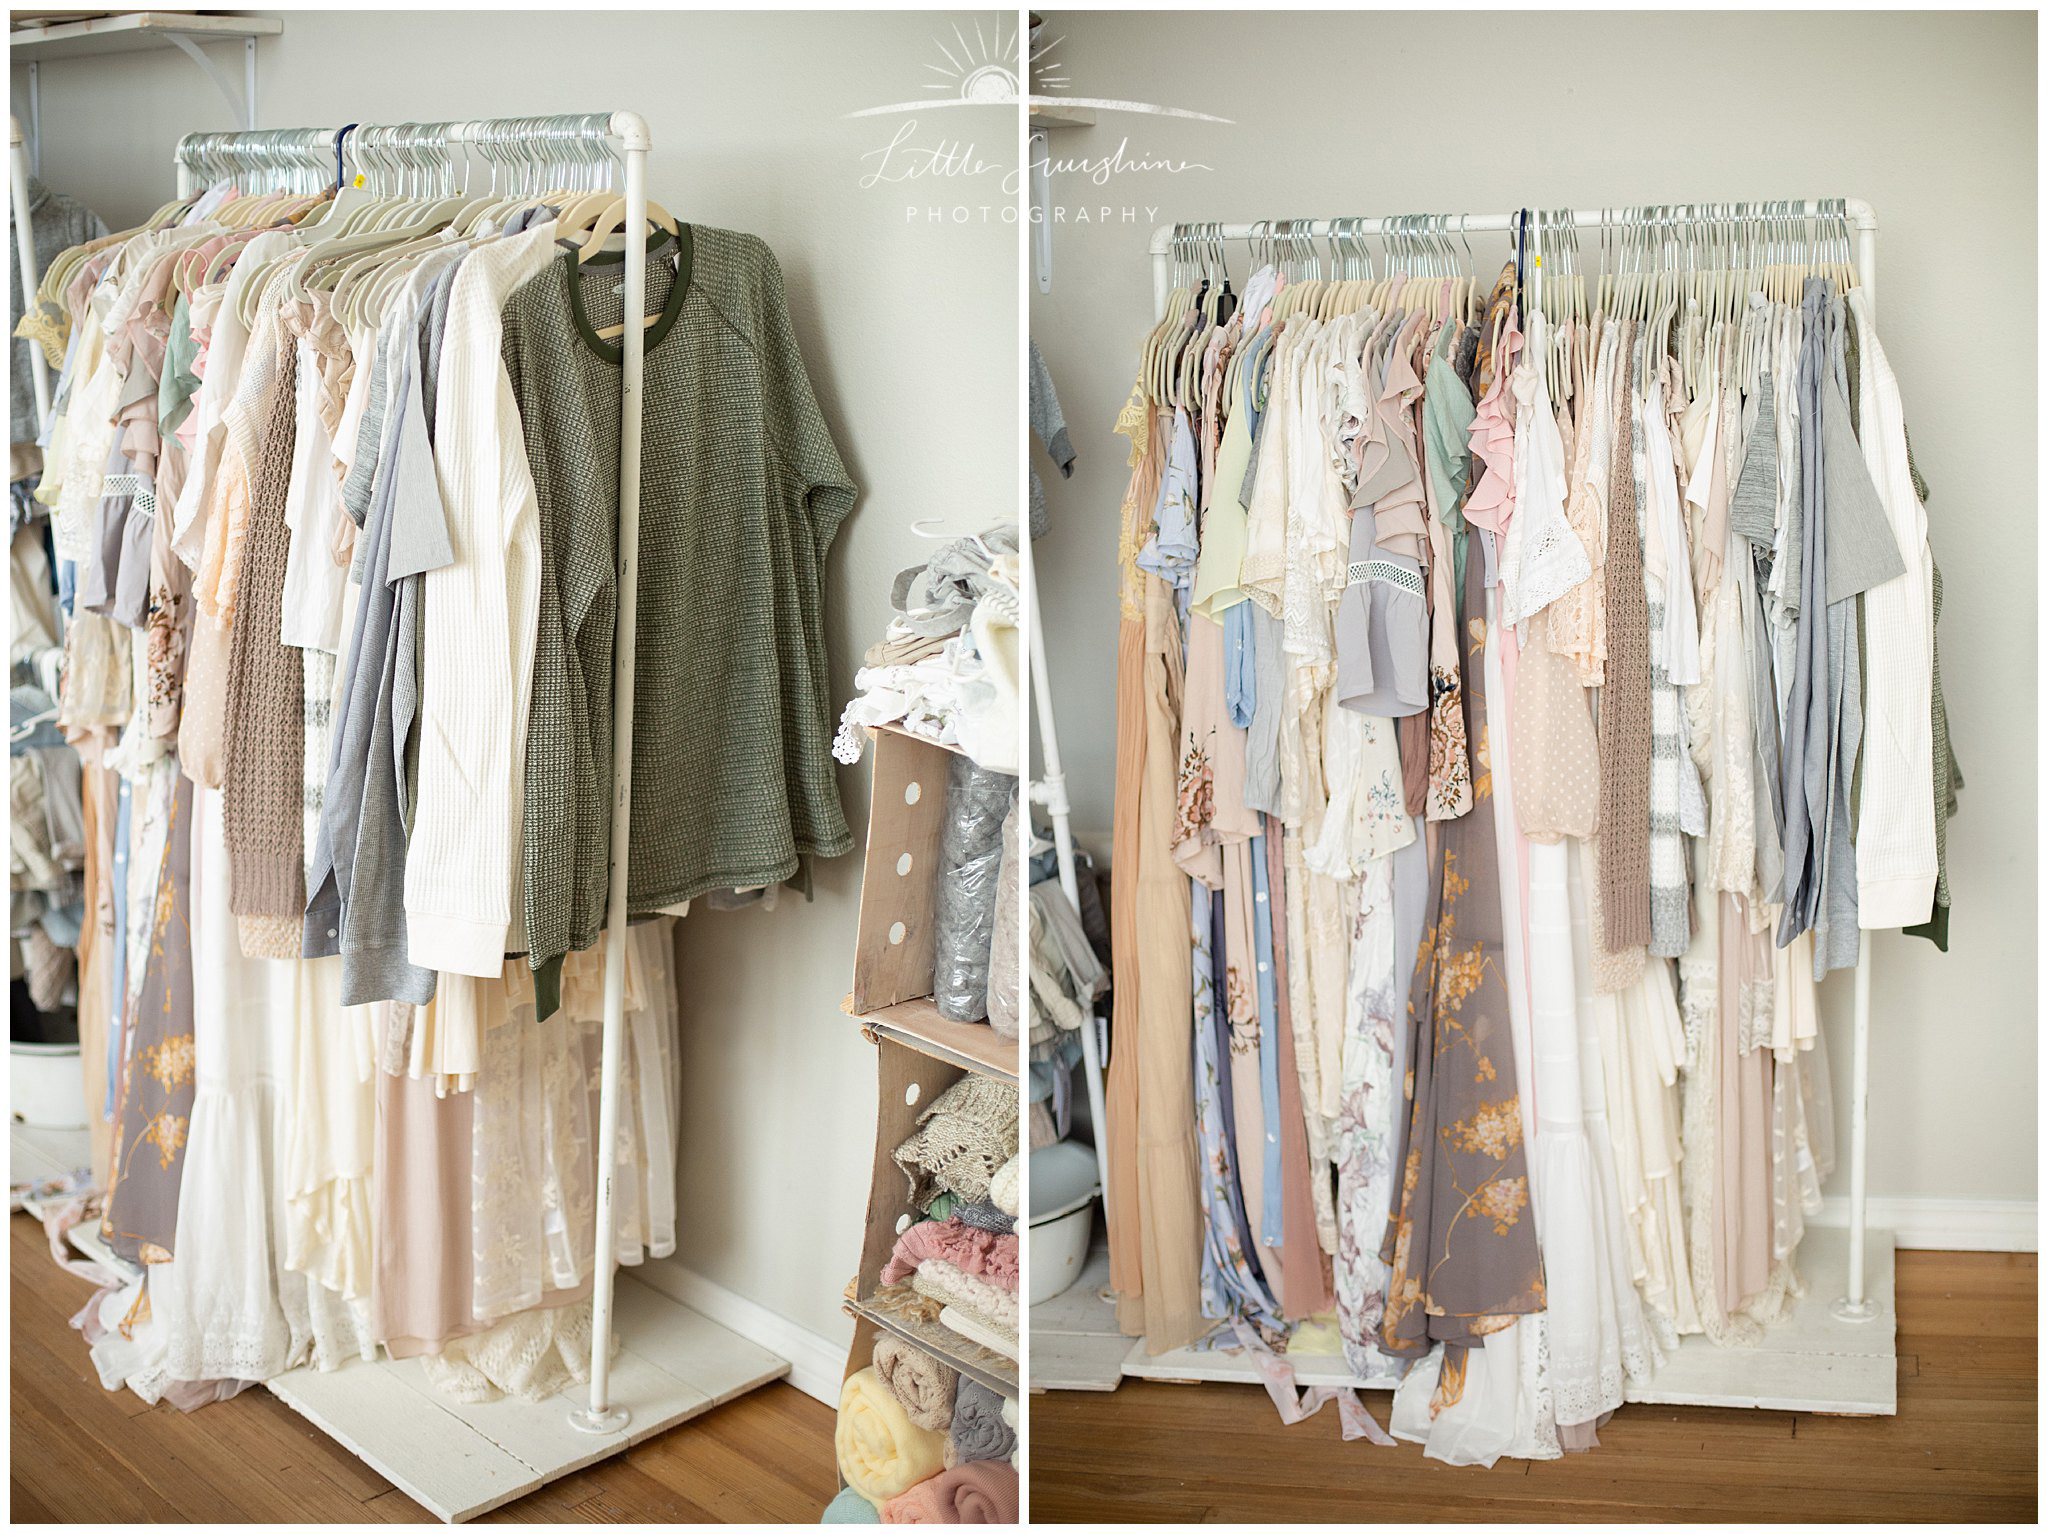
When I was searching for a wardrobe rack for my client wardrobe I knew I wanted wanted something cute but functional. When I didn’t find what I was looking for shopping, I turned to Pinterest (of course, LOL). I found a few DIY projects that I adapted into making something that worked for me and fit my style. I’ll get more into the details below.
Supplies:
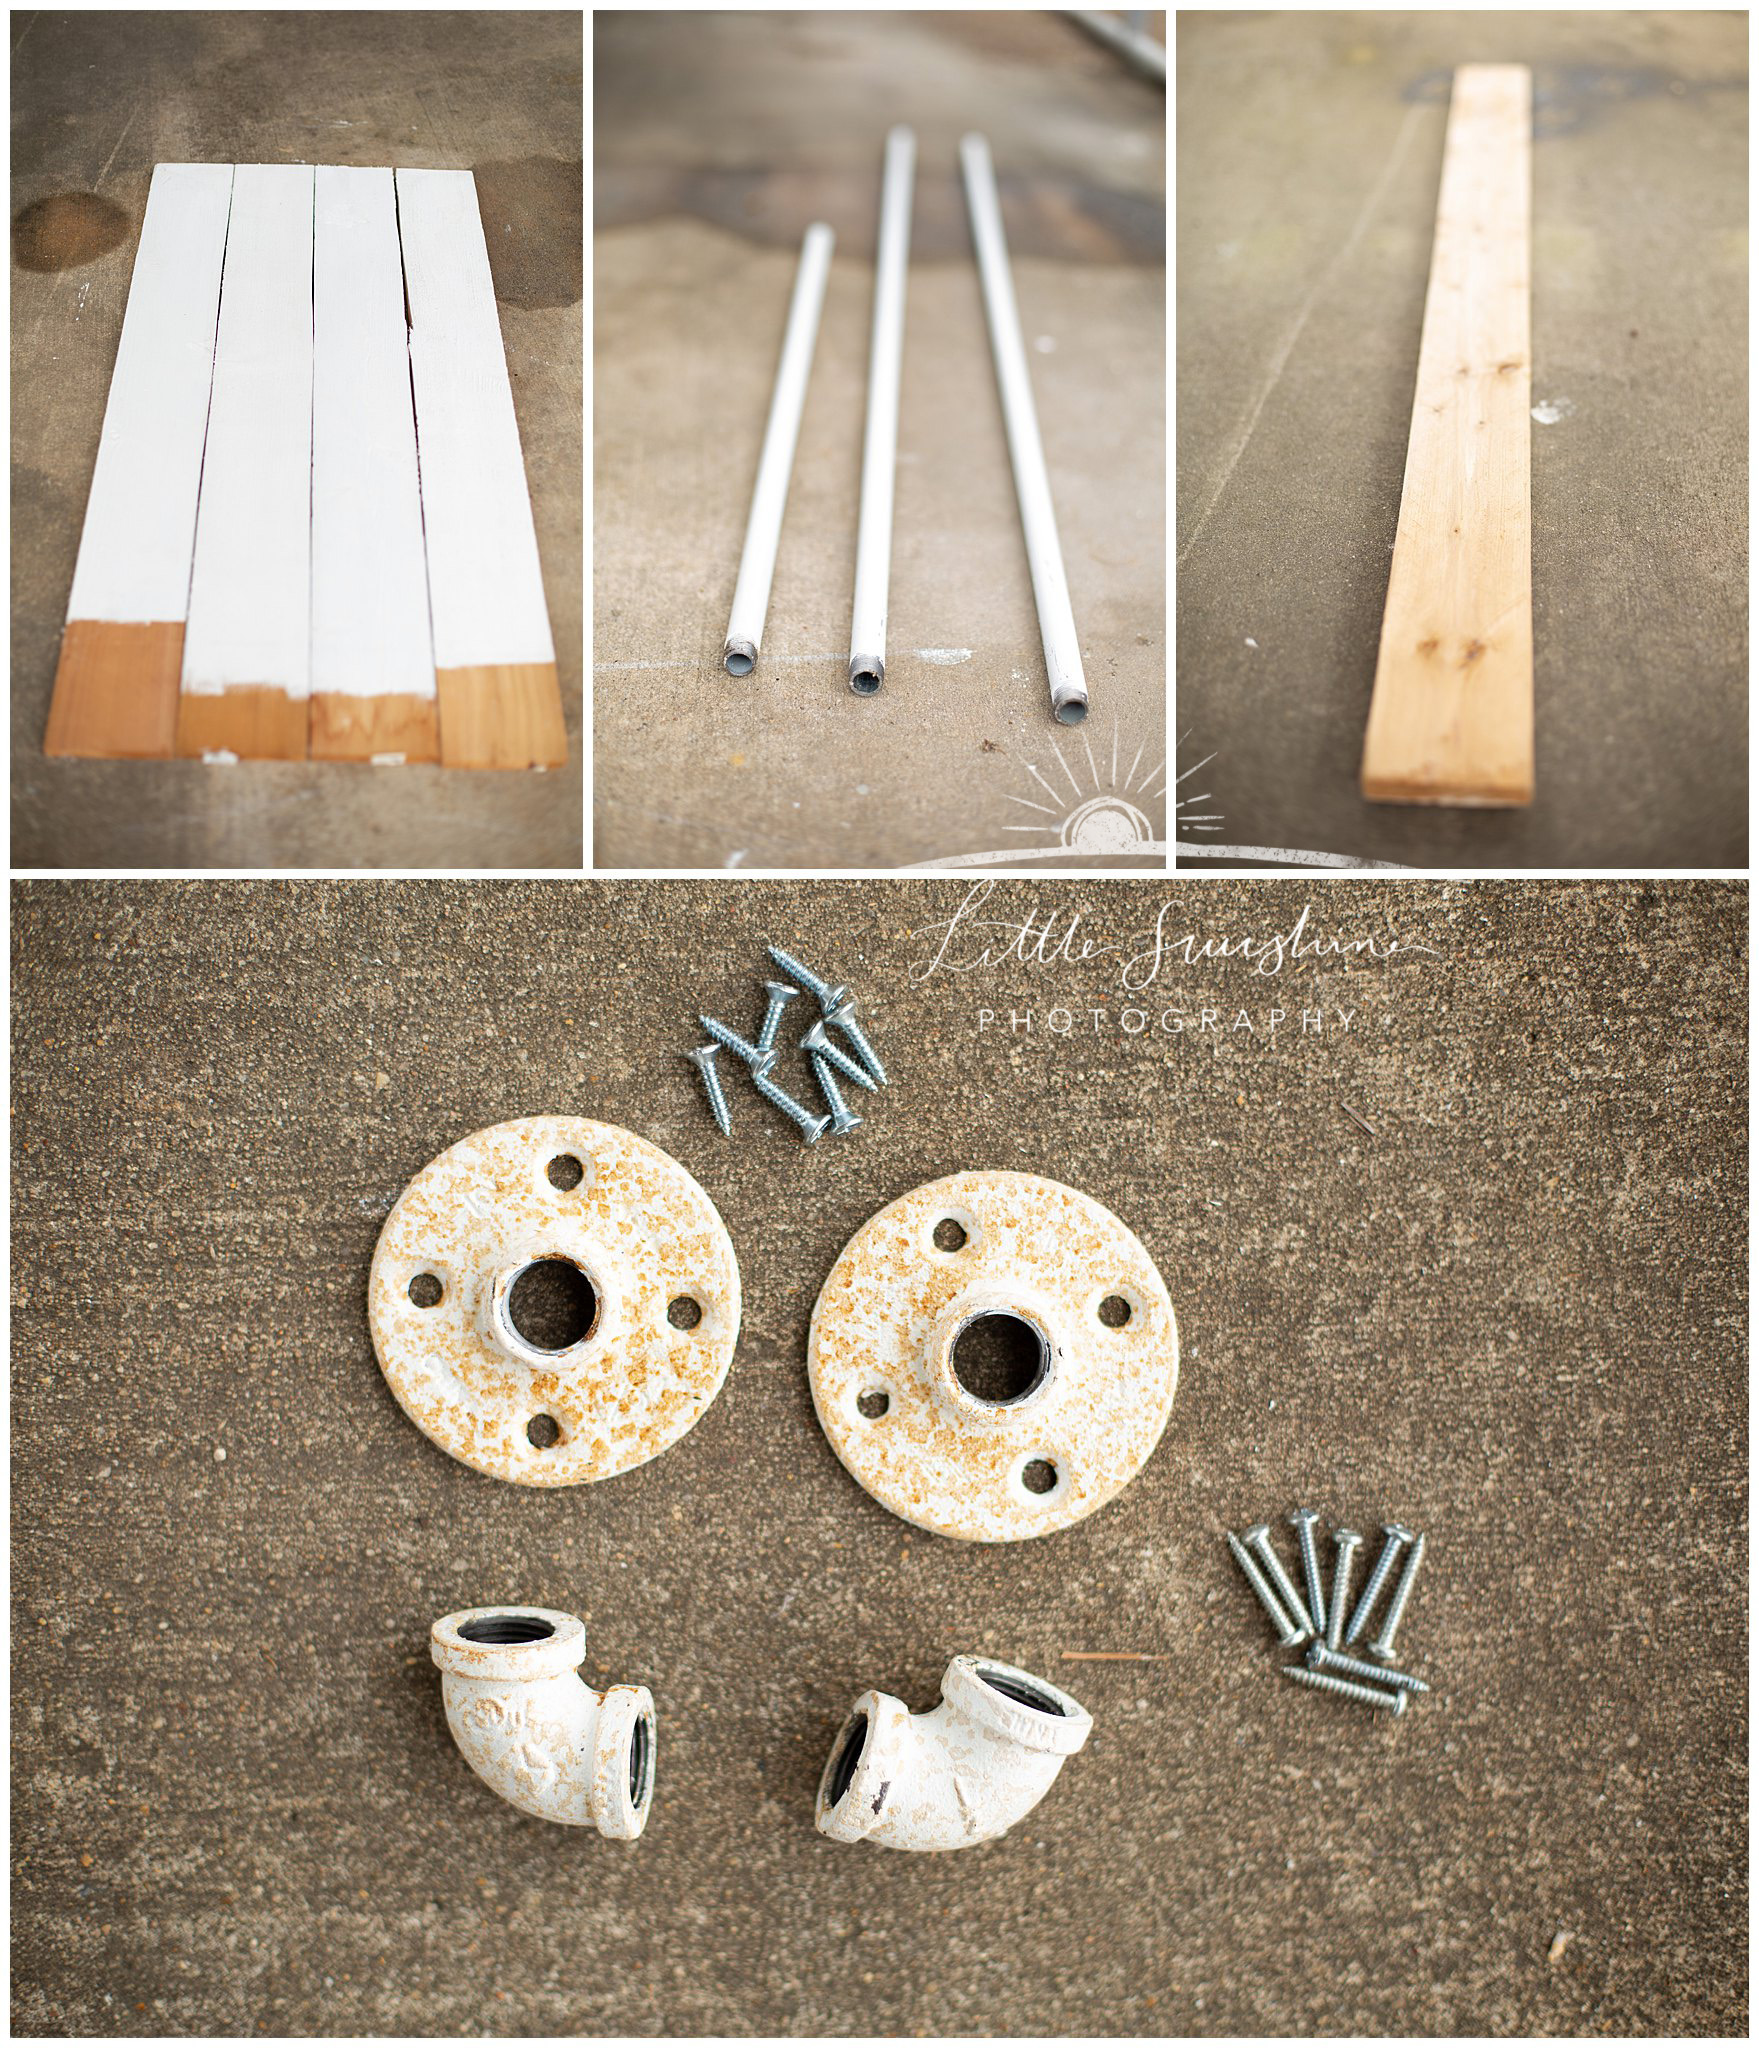
- 3 lengths of 1/2″ galvanized steel pipes cut to the size you prefer. (I chose 5 ft. for the height of my rack and 3 ft. for the length). You’ll need 2 the exact same size for whichever height you choose.
- wooden boards for the base. (I had some boards from another project. I believe they were 5ft x 6 in x 1/2 in.)
- 1 extra board, to attach the boards for your base. Again, I had an extra one laying around
- 2, 1/2″ galvanized steel floor flanges
- 2, 1/2″ galvanized steel 90 degree elbows
- 8, 1/2″ screws
- 8, 3/4″ screws
- power drill
Getting started:
- Choosing your crossbar (the part your clothes will hang on) length. So I shopped for everything at Lowe’s because it’s closest to my studio. Everything was in the plumbing department. They have some pipes pre-cut to certain lengths. The 3 foot pipe was pre-cut. For the 5 foot pipes, I just grabbed a 10 foot piece and had them cut it in half for me. *Important note* They use grease when cutting them, and it will get everywhere if you’re not careful when loading them into your vehicle. I may or may not have learned this the hard way.
- Next, your boards for your base will need to be slightly longer than your crossbar to give yourself enough room to attach the pipes to the base with the flanges. Since I already had boards I home, I just cut them using my hubby’s power saw. That was the most fun part because power tools rock. It even had a cool laser guide, so if you’ve never used power tool, I’m here to tell you that you’re missing out! And, yes, I got a lecture about how I could’ve cut off a limb when he got home and discovered I used his saw. Anyway…. If you don’t want to use a saw or be lectured, just get them to cut them for at the home improvement store when you’re shopping for supplies. They need to be about 1 ft. longer than what you choose for you crossbar length. The extra board you use to attach the boards of the base together will need to be cut to be slightly less wide than your base. My base was about 2 feet wide, so I cut my board to 22 in. You get the idea.
- If you’re going to paint your rack a certain color, I would paint all your parts before assembling. You can touch up any spots again after. I cleaned the pipes really well with some dish soap and water and scuffed them up with some steel wool to help the paint stick better. You may want to choose a paint that is actually made for metal. I had some paint leftover from another project, and it has scratched off pretty easily.
Assembly:
- Flip your four boards over so they are painted side down. Then, you will your drill and the 3/4″ screws to attach them together at each board like below. I used 3/4″ since both boards were 1/2″ thick. If you want your boards to be thicker, you will need longer screws. They need to be long enough to go through the width of both boards, but short enough that it won’t stick out the top side of your base. You need to do this at both ends of your base.
 * Tip… If you try to screw it in where there’s a knot in the wood (like below) you will very quickly get annoyed and contemplate throwing the drill. So, just scoot over a little away from that spot.
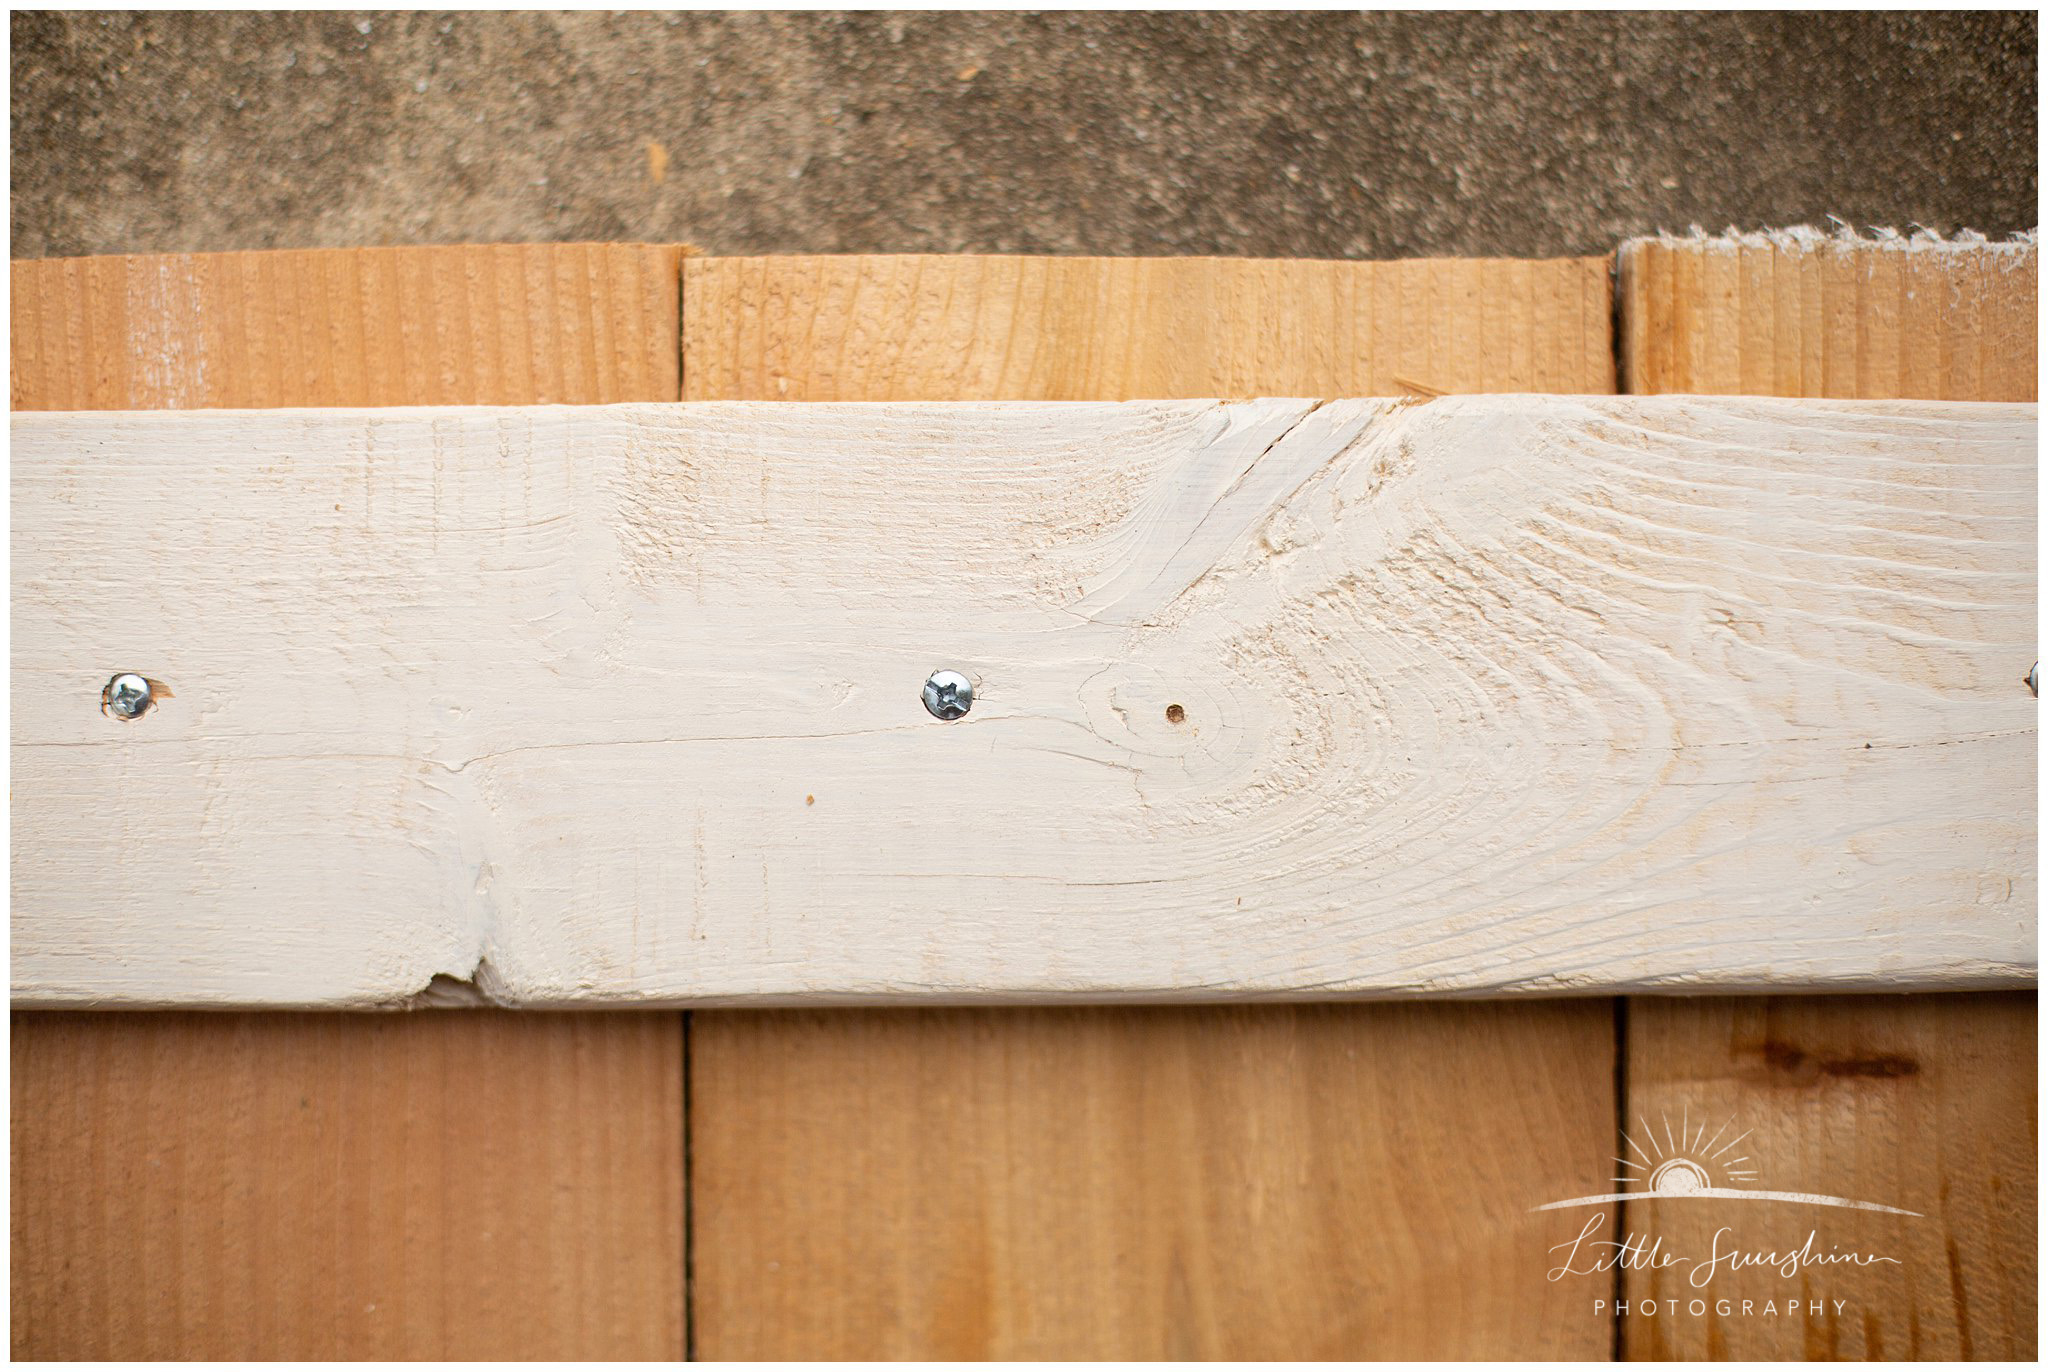
- Flip your base back over to get ready to attach the floor flanges. This is what you’ll use the 8, 1/2″ screws for.

- Once you have everything assembled with the pipes, do your paint touch ups.
- That’s it. Easy peasy! Give yourself a high-five for being awesome! You can even add casters to the bottom if you want it to be to roll.


Leave a Comment